
|
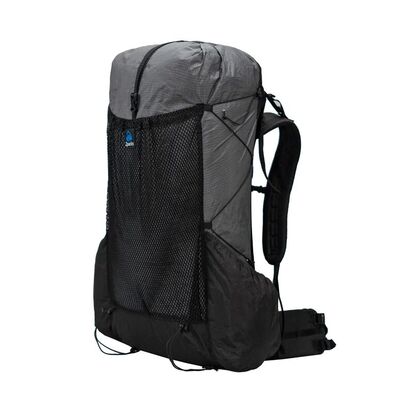
As an outdoor writer and photographer, I spend a lot of time on the trail. Long days with a fully-laden pack is part of my job so I am constantly looking for products which help me lighten the load, without a reduction in performance. Often one of the heaviest things a backpacker carries is the backpack itself and the differences in weights between products can be large. The very lightest packs are light because they incorporate the lightest products available and these are pared down to the bare minimum. Very light materials tend to be very thin. And very thin material is often not very durable.
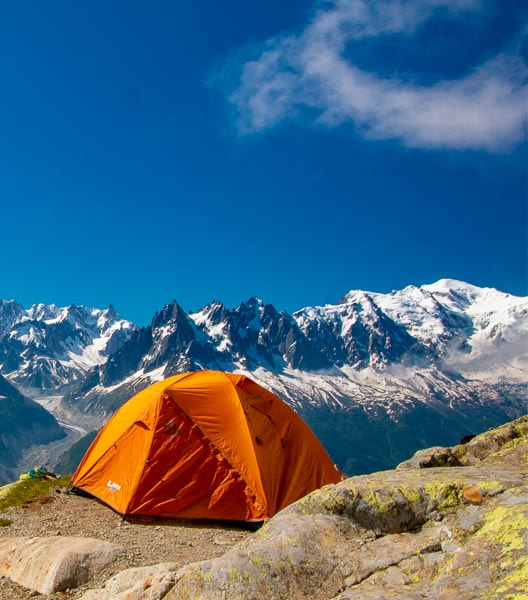
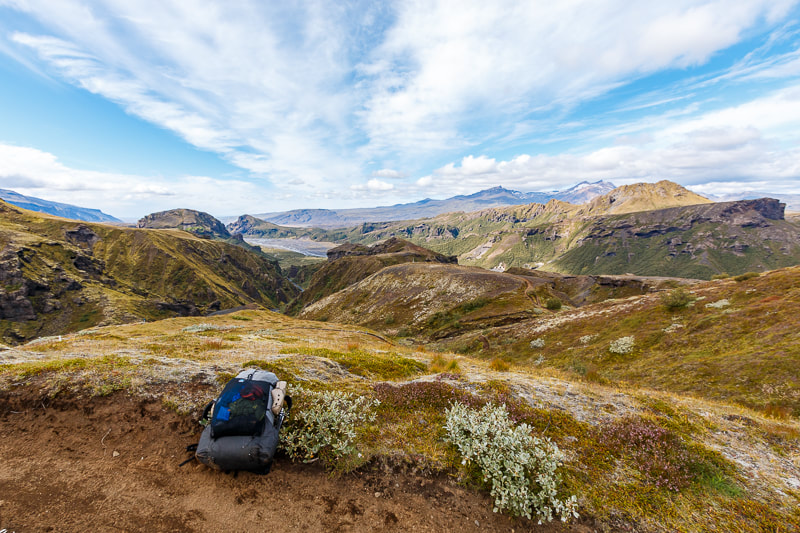 Zpacks Arc Haul Ultra 60L on the trail in Iceland First Impressions
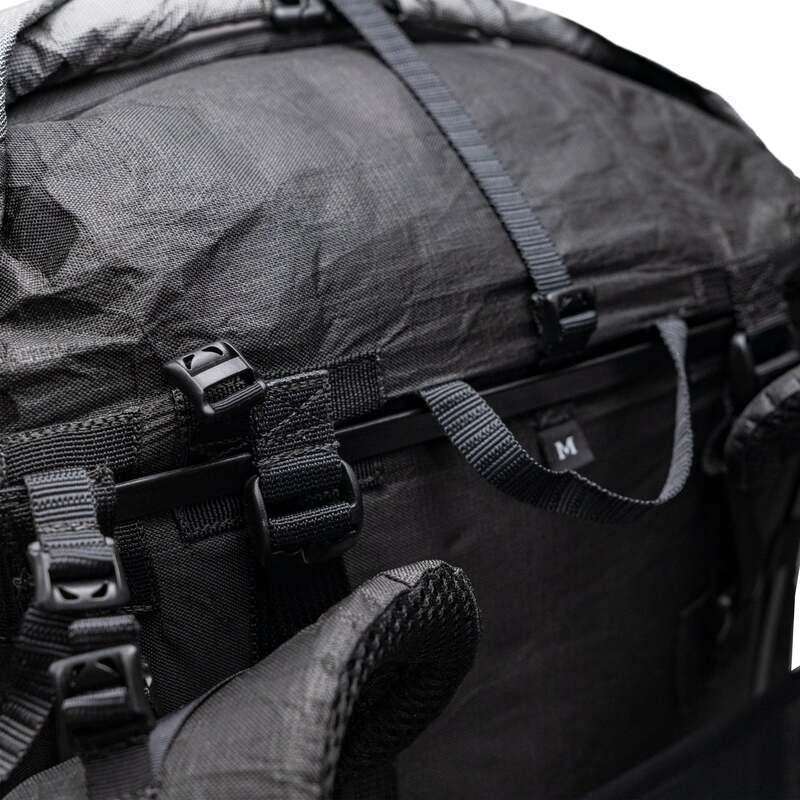
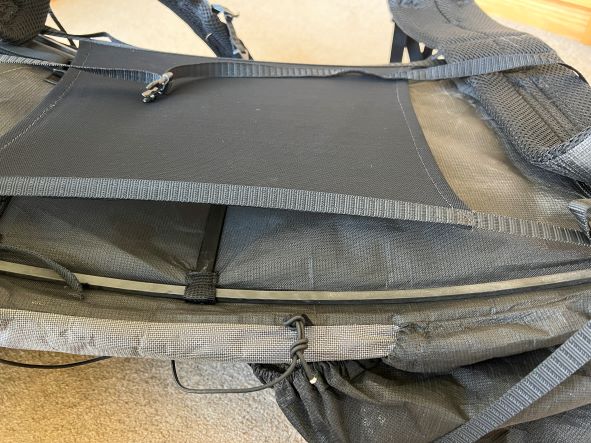
FittingI found that fitting the Arc Haul was easier than fitting the Arc Blast because the frame has been pre-tensioned. There is a good video on Zpacks’ website which clearly shows you how to adjust the straps, etc. Once fitted properly, the pack feels snug, secure and comfortable. There are few manufacturers which give such good guidance on fitting. I am 183cm tall and I chose the medium size: apparently almost nobody goes for the large. It fitted me well but only just. I think that anybody slightly taller than me might find the medium to be too small. One minor observation: I have both the Arc Haul and Arc Blast in the same sizes and I found the Arc Haul to be ever so slightly smaller than the Arc Blast. With the Arc Haul, I was at the very limits of the size band but with the Arc Blast I had a tiny margin to play with. Testing
Water-proofing: I tested the pack over 17 days in the wettest part of a very wet country and I found that the Ultra 200 material is very waterproof. I noticed no difference in this regard from the Arc Blast which also performs amazingly. There are a few places where a small amount of water does get in but this is a minor gripe as the pack scores far better than its competitors in this regard. I would still carry a dry-bag though on longer trips but that is no issue as good ones weigh a mere 20g. Features
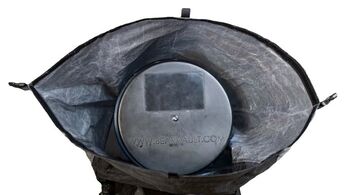
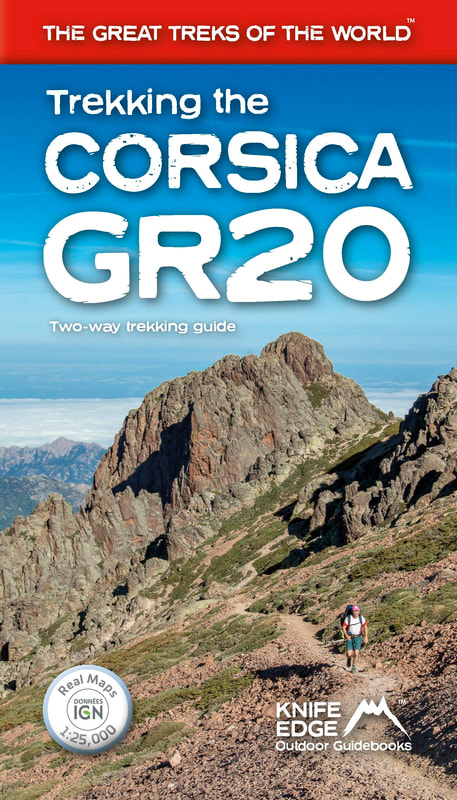
Roll-top closure: European trekkers will take a while to get used to the roll-top closure which is quite unlike traditional packs. However, I have to say that I am a complete convert. It saves weight and is very waterproof. You may miss having a pocket on top but this is easily remedied by adding one or two of Zpacks’ excellent belt pouches. Side pockets: there are two and they are well-designed, making it easy to reach for a water bottle or other items. They fit Nalgene bottles but I would prefer them to be ever so slightly bigger but that is a minor gripe. ConclusionAs well as Scotland’s Cape Wrath Trail, I have also now carried the pack for many weeks in the tough and wet environment of Iceland. The Arc Haul Ultra 60L has now replaced the Arc Blast 55L as my ‘go-to’ pack for long-distance treks. It is only 18g heavier than the current version of the Arc Blast yet it is 5L bigger, with tougher outer material and frame. In fact, it is almost unbelievably light. Yet I found it to be stable, durable and very comfortable. Unlike most other packs, it is almost completely waterproof. Despite the lightweight construction, it performed extremely well. At $399 it is not cheap but if you like to travel ultralight then it is a price worth paying. Andrew McCluggage is an outdoor writer and photographer. He is also the CEO of Knife Edge Outdoor Guidebooks. He has written many books for walking and trekking including The Tour du Mont Blanc, Trekking the Dolomites AV1, Trekking the Corsica GR20, Trekking the West Highland Way, Trekking the Hadrian’s Wall Path, Trekking the Coast to Coast Path and The Haute Route: Chamonix to Zermatt. His latest book is Trekking the Mallorca GR221. Follow Andrew on Facebook and Instagram: @knifeedgeoutdoor Trekking the Corsica GR20
£15.99
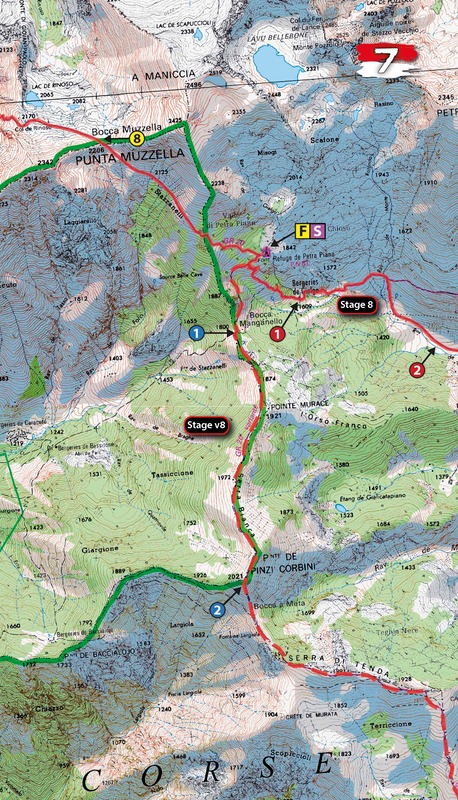
Available now! The only two-way guide to the GR20: both northbound and southbound routes are described in full. Real IGN Maps included (1:25,000): no need to carry separate maps. 15 different itineraries: schedules of 9, 10, 11, 12, 13, 14, 15 and 16 days. Includes both northbound and southbound itineraries. Difficult calculations of time, distance and altitude gain are done for you. Also includes:
Trekking the Mallorca GR221
£16.99
Available Now! The definitive two-way guide to the Mallorca GR221 (the Drystone Way): both northbound and southbound routes are described in full. Real Maps: Full mapping inside (1:25,000) by Editorial Alpina. All accommodation is numbered and marked on the maps. 12 different itineraries: schedules of 7, 8, 9, 10 and 11 days for hikers and runners. Includes both northbound and southbound itineraries. Difficult calculations of time, distance and altitude gain/loss are done for you. Also includes:
Trekking Iceland's Laugavegur Trail (& Fimmvörðuháls Trail)
£17.99
Available Now! The definitive two-way guide to Iceland's Laugavegur Trail (& Fimmvörðuháls Trail): both southbound and northbound routes are described in full. Real Maps: full mapping inside (1:40,000), made specifically for the treks by Knife Edge Outdoor Guidebooks. All accommodation/campsites are numbered and marked on the maps. 14 different itineraries: schedules of 2, 3, 4, 5, 6 and 7 days for hikers and runners. Includes both southbound and northbound itineraries. Difficult calculations of time, distance and altitude gain/loss are done for you. Also includes:
Trekking Map: Iceland's Laugavegur Trail (& Fimmvörðuháls Trail)
£16.99
Available Now! Waterproof sheet map for Iceland's Laugavegur Trail (& Fimmvörðuháls Trail): 1:40,000. Includes free GPX downloads for the trails. The definitive map to Iceland’s two best trails: larger scale and more detail than any other map. Made specifically for the treks by Knife Edge Outdoor Guidebooks.
The Laugavegur Trail is one of the world's most beautiful and aspirational treks. It leads you into the heart of Iceland’s unique ice-capped, volcanic terrain. Experience spectacular and unusual landscapes, the likes of which you will not find anywhere else on the planet. Impressive volcanic peaks are a constant companion and steam gushes from the ground. This is Iceland at its best and it will be an adventure that you will never forget Everest Base Camp: Trekking Map (includes Classic EBC, Three Passes & Gokyo Lakes)
£16.99
Available now! The best sheet map for the Everest treks: Classic EBC, Three Passes & Gokyo Lakes (all clearly colour coded). 1:40,000 - larger scale and more detail than any other Everest map. Perfect for planning and navigation. Includes walk-in route to Lukla Made specifically for the Everest treks by Knife Edge Outdoor Guidebooks:
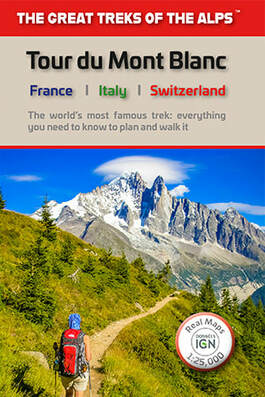
Tour du Mont Blanc (2022 updated version)
£16.99
AVAILABLE NOW!
Complete guidebook for planning and trekking the Tour du Mont Blanc, the world's most famous trek Real maps for each stage: 1:25,000. No need to carry a separate map! Unique Itinerary Planner: plan a bespoke itinerary to match your ability and vacation schedule. All difficult calculations of time, distance and altitude gain are done for you Everything the trekker needs to know: route descriptions, costs, budget, difficulty, weather, how to get there, and more Full accommodation listings: spectacularly situated mountain huts, villages and hamlets Full section on camping: a complete list of camping locations 10 exciting variants to the main route! Information for both self-guided and guided trekkers Trekking the Dolomites AV1 (2024 updated version)
£16.99
Fully Updated for 2024! The only guidebook exclusively for the AV1. Real maps inside (Tabacco 1:25,000): the finest maps available for the Dolomites. Everything you need to know to plan and walk Italy's most popular long distance route. Also includes: Numbered waypoints linking maps to text Unique Itinerary Planner: plan a bespoke itinerary to match your ability and vacation schedule. All difficult calculations of time, distance and altitude gain are done for you 7 Proposed Itineraries of between 6 and 11 days Everything the trekker needs to know to plan the route: route descriptions, costs, budget, difficulty, weather, how to get there, and more Full accommodation listings: spectacularly situated mountain huts Section on Camping Exciting variants to the main route Information for both self-guided and guided trekkers Edge to edge colour: the most modern and beautiful guidebooks Trekking the West Highland Way: Two-way guide
£16.99
Available Now! The definitive two-way guide to the West Highland Way: both northbound and southbound routes are described in full. Real Maps: Full Ordnance Survey Explorer mapping inside (1:25,000) 17 different itineraries: schedules of 3, 4, 5, 6, 7, 8, 9, 10 and 11 days for hikers and runners. Includes both southbound and northbound itineraries. Difficult calculations of time, distance and altitude gain are done for you. Also includes:
Trekking the Hadrian’s Wall Path (2024 Updated Version)
£16.99
Available now! Real OS maps 1:25,000 The definitive two-way guide to the Hadrian’s Wall Path: both eastbound and westbound routes are described in full. 14 different itineraries: schedules of 3, 4, 5, 6, 7, 8 and 9 days for walkers and runners. Includes both northbound and southbound itineraries. Difficult calculations of time, distance and altitude gain are done for you. Also includes:
Hadrian’s Wall was one of the Romans’ most ambitious structures. When completed, it ran for 73 miles between the west and east coasts of Northern England. It crossed the crags and hills of some of Britain’s wildest and most beautiful terrain. The Hadrian’s Wall path is one of England’s official ‘National Trails’. It leads you on an unforgettable journey of discovery along the route of the Wall. Discover the incredible surviving sections of the Wall and its forts, milecastles and turrets. Trekking the South Downs Way
£14.99
Available Now!
The definitive two-way guide to the South Downs Way: both westbound and eastbound routes are described in full. Real Maps: Full Ordnance Survey Explorer mapping inside (1:25,000) 18 different itineraries: schedules of 4, 5, 6, 7, 8, 9, 10, 11 and 12 days for walkers and runners. Includes both westbound and eastbound itineraries. Difficult calculations of time, distance and altitude gain are done for you. Also includes:
The South Downs Way leads you on an unforgettable journey of discovery through the magnificent chalk hills of Sussex and Hampshire. It travels the length of the South Downs National Park across wonderful hills and meadows bedecked with wild-flowers, through endless fields of shimmering golden corn and along the edge of the epic white cliffs of the Seven Sisters and Beachy Head. It is one of England’s official ‘National Trails’ and is an unforgettable experience Trekking the Cotswold Way
£15.99
Available Now! The definitive two-way guide to the Cotswold Way: both southbound and northbound routes are described in full. Real Maps: Full Ordnance Survey mapping inside (1:25,000). All accommodation is numbered and marked on the maps. 18 different itineraries: schedules of 4, 5, 6, 7, 8, 9, 10, 11 and 12 days for hikers and runners. Includes both southbound and northbound itineraries. Difficult calculations of time, distance and altitude gain/loss are done for you. Also includes:
Trekking the Coast to Coast Path
£16.99
Available Now! The definitive two-way guide to the Coast to Coast Path: both eastbound and westbound routes are described in full. Real Maps: Full Ordnance Survey mapping inside (1:25,000). All accommodation is numbered and marked on the maps. 19 different itineraries: schedules of 11, 12, 13, 14, 15, 16, 17, 18 and 19 days for hikers and runners. Includes both eastbound and westbound itineraries. Difficult calculations of time, distance and altitude gain/loss are done for you. Also includes:
0 Comments
So here is my advice:
Depending upon how events play out and exactly when the refuges open, it is possible that the TMB and AV1 are the quietest they have been in decades. And that is something that I am going to see. NEVER STOP DREAMING!!!
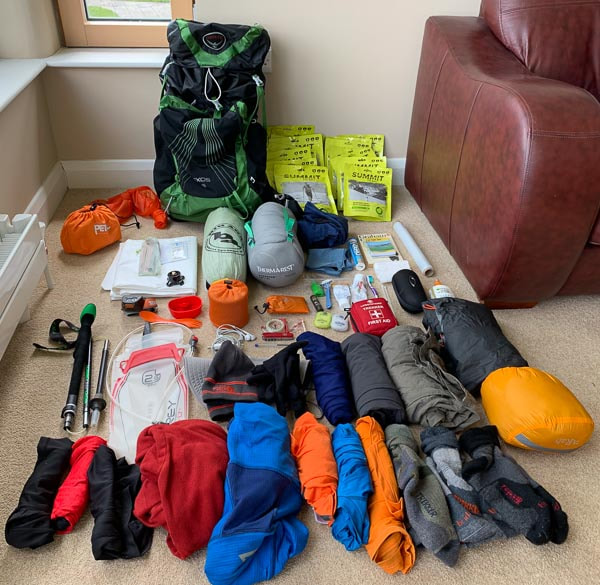 This is everything I am bringing on the GR20 (except for boots) Multi-day trekkers carry all their worldly possessions on their backs so it is not surprising that one of the most common topics of conversation is pack weight. Ultra-light backpacking is very much in vogue these days, fuelled by thru-hikers from the US on long-distance trails like the Pacific Crest Trail. The gear manufacturers are riding this trend by making some incredible kit that makes it easier and easier for us to carry less weight. Less weight means less strain on the body and this enables us to travel further and faster. These days, on hut to hut treks (where no camping equipment is required), I can achieve a pack weight of around 5kg (excluding water). For camping treks, I now carry 7kg (excluding food and water): and that is without having to get rid of some luxuries. I am starting the Corsica GR20 this week and will be camping all the way. I thought some of you would like to see what I will carry so I made this video.......
You don’t need trekking poles on the Tour du Mont Blanc. In fact, you don’t need trekking poles anywhere. Plenty of people hike all over the world without them and have few problems. However, in my opinion, they are desirable: a very good idea indeed whether on the Tour du Mont Blanc or any other mountain hike. And here’s why:
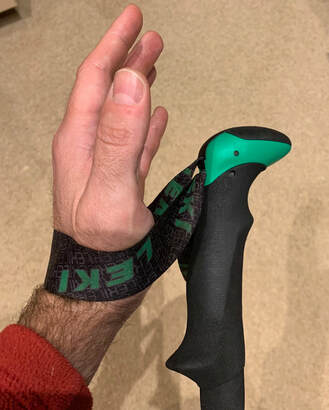
 Do I need trekking poles for the Tour du Mont Blanc? So what are the downsides of using poles? Well some people find that they get in the way: if you do not place them right then you can trip over them. However, I believe that is just a matter of a little practice. Others say that they make you burn more calories so you need to carry more food. This seems logical but I do not think that it makes that big a difference. And then there is the matter of the extra weight but with the introduction of carbon poles this is not a massive issue. In summary, I believe that these issues are vastly outweighed by the benefits. One pole or two? If you have taken on board what I have said above, then it will seem obvious that two poles are best. However, one pole is definitely better than none. In fact, I only walk with one pole these days. A few years ago, I had a shoulder operation and I got into the habit of using only one while going through rehab. I am always concerned about giving that shoulder too much work so I still use one, swapping between arms periodically. The advantage of using one is that you always have a hand free. But if I could, I would use two without hesitation. Should I use the wrist straps? My answer is emphatically yes! The straps can be used to take most of the weight off your fingers and hands, reducing strain. Your wrists, which are stronger, do much of the work. Straps also help reduce blisters on your fingers and palms because you do not need to grip the pole so tightly. However, poor quality straps can also cause chaffing. The straps should be worn the same way as those on ski poles: you put your hands up through the straps rather than down. This means that if you fall then you are less likely to break your wrist as your hands can come free of the poles more easily.
Telescopic poles or folding poles? Telescopic poles collapse by pushing the sections into one another. Normally there are three sections and they tend to be very robust, lasting for years. Folding poles usually have four sections connected by plastic covered string. The sections do not fold up beside each other and so the folded pole is wider than the collapsed telescopic pole and tends to be less durable. For decades, I used telescopic poles but once I bought a folding set, I never looked back. Although, they are less durable, the folding pole has two key advantages:
 A folding carbon walking pole What are anti-shock poles? Anti-shock poles have shock absorbers built in so that the stress on your arms and wrists is reduced. There are various different mechanisms: one of the earliest was basically to have a spring within the pole. This was quite heavy. However, nowadays there are some really cool lightweight systems. My poles have a neat piece of shock-absorbing rubber within the tip and it really works. Some say that the shock absorber affects your contact with the ground but I have never found that. What is the best material for the handles? In simple terms, there are three types: cork, rubber and foam. Cork (its rarely real cork these days) is the nicest to use: very comfortable and less likely to give you blisters. But it is quite heavy. Rubber handles, in my opinion, are the worst. I find them uncomfortable to use for long periods and most likely to cause rubbing. I hate them. Foam used to be horrible but these days if you buy good quality poles, you should get good foam. My current poles have foam handles and they are excellent: I have walked thousands of km with them and I have never had a problem. Everyone’s hands are different though so my advice is to go to a shop and try them out. It’s not the same as walking the 170km of the TMB with them but some comfort issues will be immediately obvious. Remember though that there are loads of cheap poles out there and the handles are unlikely to have been made with good stuff: when you have blisters after about 100km, you may wish that you had bought more expensive ones! So there it is: one fool’s views on the use of a stick!
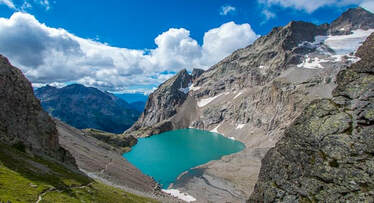
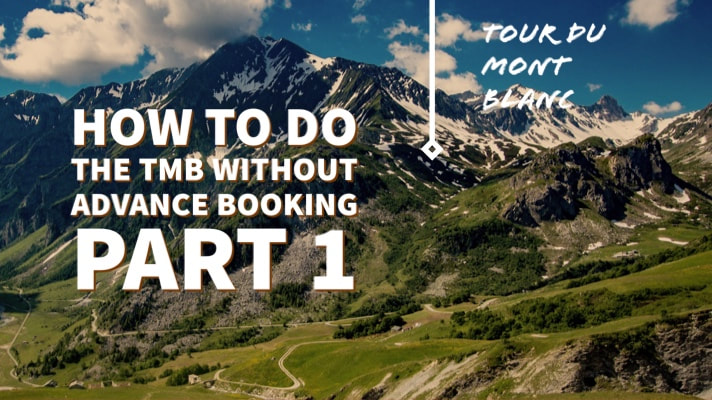
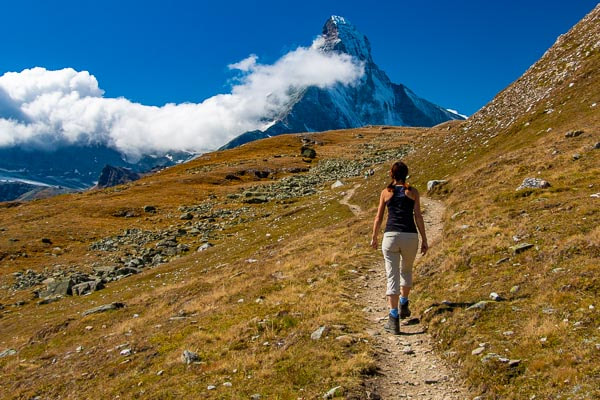
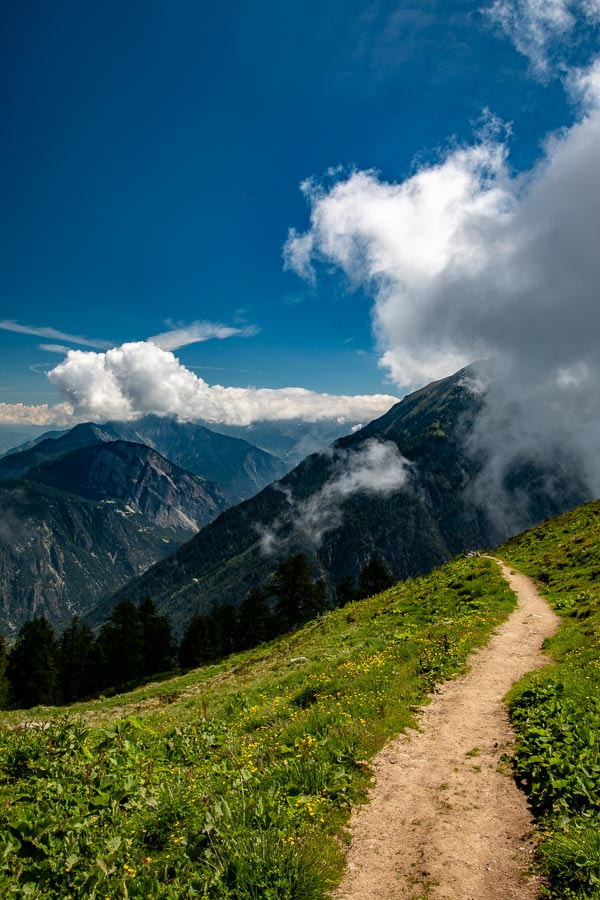
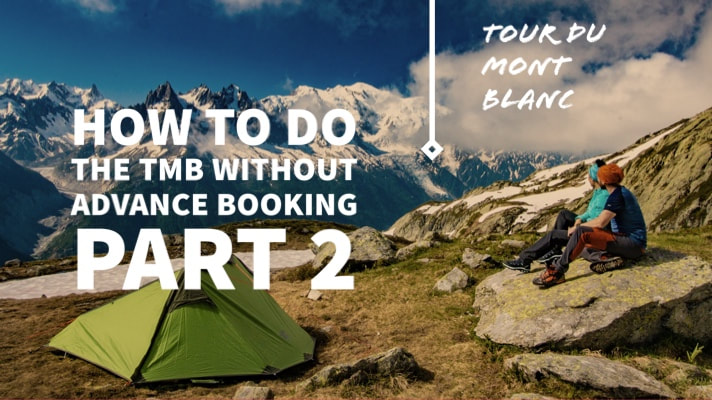
The Tour du Mont Blanc is an experience of a lifetime. No two ways about it. The scenery is exquisite, the refuges are just lovely and there is a wonderful sense of camaraderie amongst the TMB trekkers. Indeed, if the weather gods deliver clear blue skies and you are lucky enough to get accommodation, it will be an experience that you will never forget. It is not a surprise therefore that you are competing with thousands of others to secure the gold dust that is bookings for the best refuges. And such is the popularity of this astounding trek that not everyone will get bookings. Nothing good in life is easy these days particularly when it comes to trekking and travel. So what happens if you are one of the disappointed thousands? Do you simply wait until the end of the season and try to secure that alpine experience for the following year? Well that is what many do: the Tour du Mont Blanc is a famous bucket list trek after all. However, I think that is a shame. Now I am not suggesting that you should not try to book the TMB again the following year. What I am suggesting though is that the TMB is not the be all and end all of the Alps. I am telling you that there are plenty of other treks which are just as good if not better. The TMB is the one that everybody knows about because it is a circumnavigation of the most famous peak in the Alps: the mighty Mont Blanc. The Mont Blanc Massif is the highest group of mountains in the French Alps. But can you tell me what is the second highest massif? Or the third highest? I didn’t think so. The Alpine chain is absolutely huge and the Mont Blanc Massif is only a tiny portion of it. I guarantee that if you did any one of a hundred treks in the Alps, it would be an experience just as rich and fulfilling as the TMB. And most of these treks do not attract the volume of visitors that descend upon the TMB: not because the scenery is inferior but because the TMB circles the highest mountain in Western Europe and bucket lists like the word “highest”. So why wait for 12 months when you can have a magnificent Alpine experience straight away? The difficulty is knowing where to start so let me help you with a few suggestions. Walker’s Haute Route  The otherworldly Lac des Dix on Stage 6a of the Haute Route The obvious alternative, which many of you will have heard of, is the Walker’s Haute Route (WHR). This is often considered to be the sister trek to the TMB and many argue (with justification) that it is scenically superior to the Tour du Mont Blanc. It overlaps for a few days with the TMB but it is a linear route (rather than a circuit) taking you on an epic adventure between the two great mountaineering centres of the Alps. Starting in Chamonix beside Mont Blanc you walk all the way to Zermatt in Switzerland which is overlooked by the absolutely stunning Matterhorn. In between, you pass the greatest collection 4000m peaks in the Alps. And the glaciers! Oh the glaciers! They are everywhere!  The magnificent Grand Combin keeps you company for days on the Haute Route That is the good news. The bad news is that the Haute Route is also quite busy. Not as busy as the TMB but busy all the same. But it is slightly easier to book the Haute Route so if you have failed to secure TMB accommodation, then often you can still get sorted on the WHR. It is, however, a bit harder than the TMB: 206km compared to the 170km of the TMB; with 14,000m of height gain as opposed to 10,000m for the TMB. It therefore takes longer than the TMB but you do not have to do all of it. It enjoys the same camaraderie between trekkers and I prefer it to the TMB. So don’t overlook this one. Tour of the Ecrins National Park (GR54)  The wildflowers are staggering in the Fournel Valley on the GR54 A less obvious alternative is the GR54. It is my favourite trek in all the world, making a circumnavigation of the Ecrins Massif, the second highest range in France. It may be second to the Mont Blanc Massif in terms of height but not by much. And once you see it, there is no chance that you will notice that, for this is majestic high mountain terrain. And in my opinion, it is a much more real Alpine experience than the TMB. Much of the trek heads through the pristine Ecrins National Park which inexplicably gets only a fraction of the visitors that cram the Mont Blanc Massif each season. It is a truly remarkable place: a wilderness of snowy peaks, lovely pastures, incredible lakes and beautiful hamlets and refuges. Furthermore, you are much more likely to see wildlife in this protected region: chamois and ibex are regularly spotted. The path is just as good as the TMB and it has been recently waymarked so I find it to be easier to navigate than the TMB. 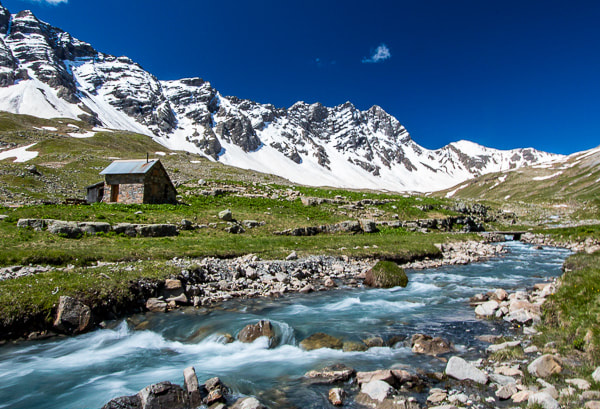 The incredible Tour of the Ecrins National Park It is about 180km so it is a bit harder than the TMB but not prohibitively so: it takes around the same length of time. And it is much easier to secure bookings. Or if you wish to camp then you will be delighted to learn that wild camping is permitted almost everywhere in the park: a rare thing these days. In my humble opinion, this is a bucket list trek. Your friends won’t know where it is but who cares as you will be doing something very special?
But I hear you say, I am new to trekking and do not want to do a trek even a little harder than the TMB. And I reply: “no problem! There are plenty of treks of similar difficulty or slightly easier. But you are going to have to wait until my next post to be appraised of this secret. To be continued.....
On the TMB you do not necessarily need to carry a stove or cooking equipment as there are plenty of shops and restaurants at which to buy food. That means that the minimum gear is as follows:
So that gives an additional total weight of.....wait for it.....1.65kg! The weight of a bottle of water! That’s it. I am pretty sure that I could extract 1.65kg of unnecessary weight from many people’s packs before adding that camping gear. For example, I mentioned a few weeks ago that I upgraded my pack itself for a weight saving of 0.7kg. Now it is fair to say that lightweight gear tends to be more expensive than the heavier stuff. But these days the price difference is often not huge if you shop around. And when you compare the cost of the gear to the money you will spend on accommodation in refuges and gîtes, it becomes a completely reasonable proposition. So to underline the point of this article: 1.65kg extra is not the end of the world, particularly if you can shave a few oz elsewhere. And therefore almost everyone can carry camping gear these days. So almost everyone can camp on the TMB. So almost everyone can do the TMB without advance booking. QED. And in fact, with gear weighing so little, you could even carry the camping gear just for one or two nights’ camping. So, if there were a few places that you can’t get bookings for, then bring the tent for those nights. Ok so there are plenty of you who don’t like camping but I can’t solve all the problems! Well what do you think?
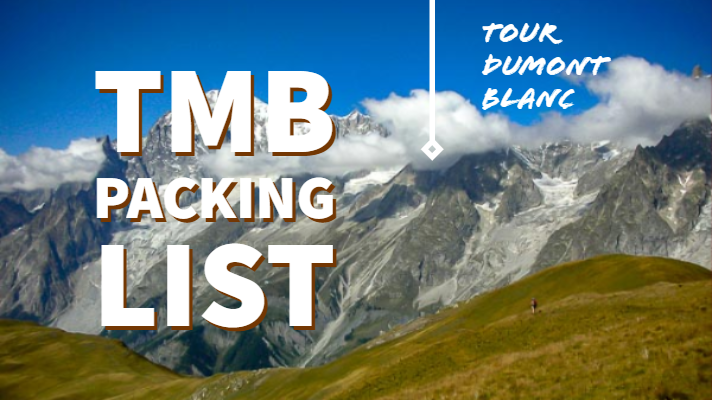
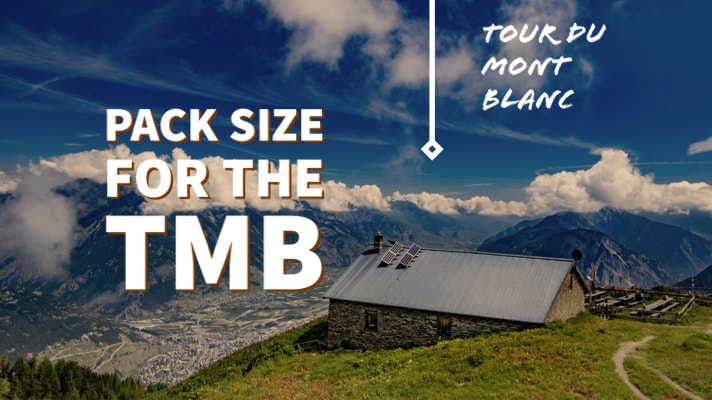
I am not going to get into the kit list today: I will cover that in a future post. But I will say that there is a natural tendency to bring too much on your first trek. As your experience grows, the contents of your pack shrink. And it is a process that never stops: after 2 decades of Alpine trekking, I am still finding ways to reduce my load. The less you bring, the smaller pack size you can use. And the smaller the pack size, the lighter your load. And that brings me neatly to weight..... Weight Every item in your pack must be carried up and down every rise and fall on the TMB. That is of course obvious but what is less obvious is that your body is accustomed to carrying only its own weight and not heavy packs. As you trek up and down mountains with a heavy pack on your back, your muscles need to adjust to this shock to the system. For many, this adjustment will take place on the TMB itself rather than in training before the trek. And that is tough work. So the lighter you can make your pack, the less stress you place on your body and the more you will enjoy the TMB. An oz here or there seems like a small thing but it all adds up. I will talk about saving weight generally in later posts so here let's concentrate on the weight of the pack itself. Surprisingly, there is a massive weight difference between different packs. Even packs of the same size can vary massively in weight. For years I used a Deuter Guide 35L pack which is a great rucksack: strong and reliable......and very heavy: it weighed 1.6kg which amounted to more than 20% of my total pack weight. At the end of its life, I bought an Osprey Talon 33L which weighs only 0.91kg, a saving of nearly 0.7kg just on one item. Much of the drive for weight saving packs comes from the US where 'through-hikers' on long trails have fuelled the demand for ever lighter gear. In my opinion that Osprey pack is excellent. Packed with features and incredibly light. They also do a 44 litre version which is light too. But other brands make light packs too. Look for the lightest pack you can find that is comfortable for you: they are not always much more expensive. And that brings me to comfort....... Comfort Unfortunately, size and weight are not the end of the matter. One final thing to consider is comfort. Ideally you want a pack with well-padded straps and hip-belt. The latter is the most important as you should carry most of the weight on your hips and not your shoulders. As a general rule of thumb, the lighter the pack the less padding you will get and the less comfortable it will be. But that is only part of the story: I think it is fair to say that the lighter you can make your pack, the less you need thick padding. The Osprey Talon for example saves weight by reducing padding, particularly around the waist area. Some find it uncomfortable but I do not: my pack is light so I do not need very thick padding around the waist. If you carry more then you will probably need more padding. Conclusion There are a lot of confusing variables here so my overall advice is as follows:
If you have any further queries you can ask me questions on our Facebook page "Tour du Mont Blanc Q&A". 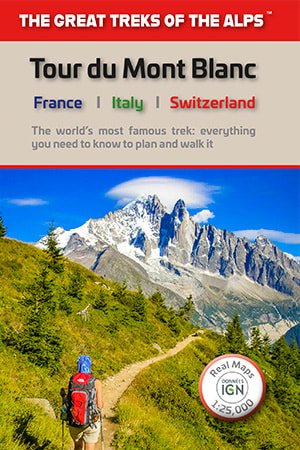 |
Andrew McCluggageblogs about life on the Knife Edge Archives
January 2024
Categories
All
|


 RSS Feed
|
|
Free UK Delivery
International Delivery also available |

|
Company |
Support |
Follow us©Knife Edge Outdoor Guidebooks 2018
|